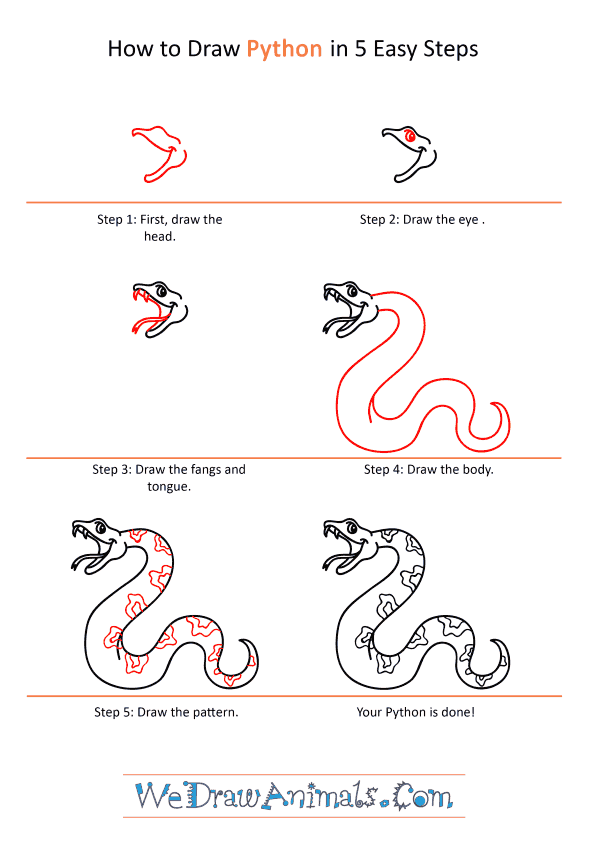
In this quick tutorial you'll learn how to draw a Cartoon Python in 5 easy steps - great for kids and novice artists.
The images above represent how your finished drawing is going to look and the steps involved.
Below are the individual steps - you can click on each one for a High Resolution printable PDF version.
At the bottom you can read some interesting facts about the Cartoon Python.
Make sure you also check out any of the hundreds of drawing tutorials grouped by category.
How to Draw a Cartoon Python - Step-by-Step Tutorial
Step 1: We will begin the python with the head and mouth. Start with two parallel, diagonal lines that connect on the left end but not the right. Repeat this step but switch the direction of the line pair so the diagonal runs in the downward direction. Connect both sets of lines at a single point in the center.
Step 2: Now, in between the first set of parallel lines, add a large dot for the eye!
Step 3: Off the base of the first set of parallel lines on the left, add two small triangles for the fangs. Right below the fangs, add a curved line in and then another set of parallel horizontal lines. They should be very close together and connect at the end in a V shape for the tongue.
Step 4: Now, off the back of the head, start drawing a bowing, curved line in the downward position, waving it in and out until it reaches the horizontal position at the bottom. Off to the left, add another wavy line that is parallel to the first, connecting both to a point at the end.
Step 5: Along the body of the python, add any detailing and pattern you like! Give him some personality!


