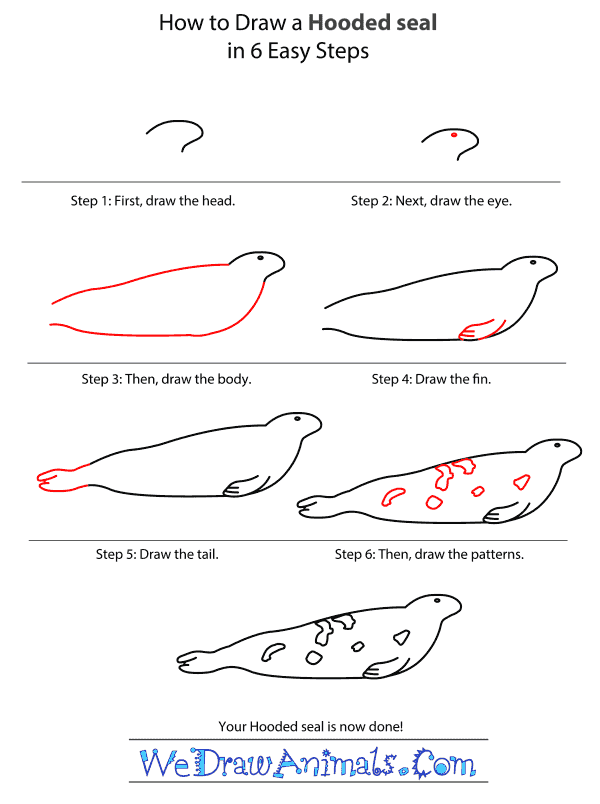
In this quick tutorial you'll learn how to draw a Hooded Seal in 6 easy steps - great for kids and novice artists.
The images above represent how your finished drawing is going to look and the steps involved.
Below are the individual steps - you can click on each one for a High Resolution printable PDF version.
At the bottom you can read some interesting facts about the Hooded Seal.
Make sure you also check out any of the hundreds of drawing tutorials grouped by category.
How to Draw a Hooded Seal - Step-by-Step Tutorial
Step 1: Draw the head, which looks like a floppy half circle.
Step 2: Add a dot for the eye.
Step 3: Extend the head into the large body of the seal.
Step 4: Add a little fin at the bottom of the seal. Add lines to make flippers
Step 5: Draw the tail, which is another series of slightly-curved lines
Step 6: Add detail to the back of the seal.
Interesting Facts about the Hooded Seal
Named for the elastic sac that goes from their noses to their foreheads that can be expanded into a balloon-like ball by males, Hooded Seals are unique among pinnipeds in many ways. They live on pack ice in four distinct areas near Iceland, Newfoundland, and Greenland.
Did you know?
- Male Hooded Seals inflate the sacs on their head by shutting one nostril and inflating a member that appears from the other nostirl.
- Hooded Seals have been recorded diving up to 3,333ft (1,016m) and stay below for up to 52 minutes.
- Unlike other seals Hooded Seals are not social, they are highly territorial, spending most of the year alone.
- Hooded Seals have the shortest weaning period of any known mammal at 3-5 days.
- Starting in the 1990’s they began appearing as far south as the Canary islands.
Lesson plan note: Hooded Seals are unique because of their elastic sac that inflates to a balloon-like ball. Gather enough balloons for each student in the class and giving them a piece of tape. Have each student inflate their balloon and then tape it to their foreheads to feel like a Hooded Seal.


