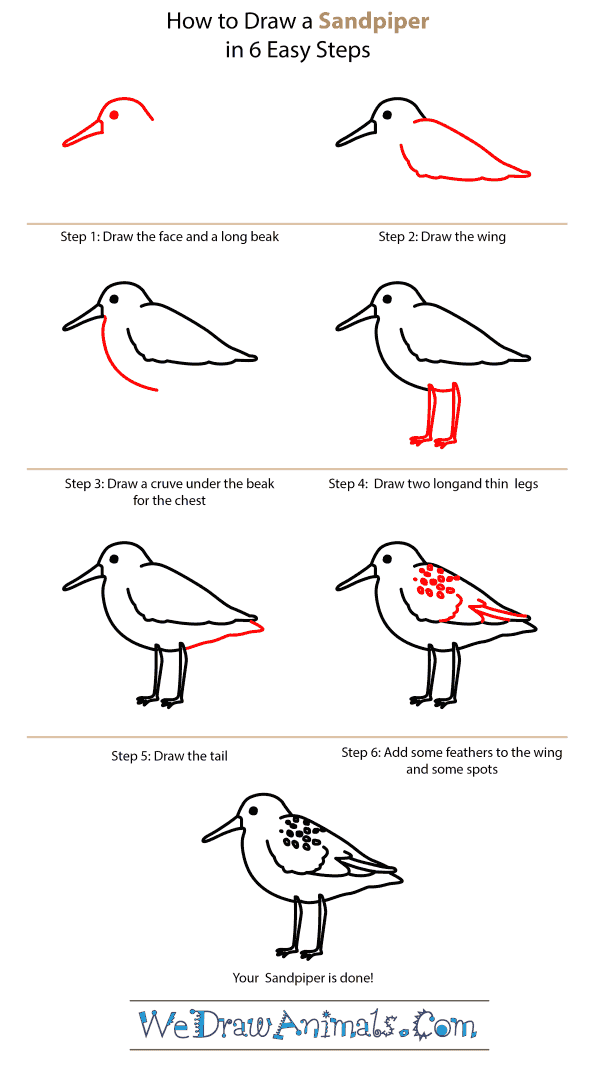
In this quick tutorial you'll learn how to draw a Sandpiper in 6 easy steps - great for kids and novice artists.
The images above represent how your finished drawing is going to look and the steps involved.
Below are the individual steps - you can click on each one for a High Resolution printable PDF version.
At the bottom you can read some interesting facts about the Sandpiper.
Make sure you also check out any of the hundreds of drawing tutorials grouped by category.
How to Draw a Sandpiper - Step-by-Step Tutorial
Step 1: Make a rounded head, complete with a long pointed beak and single beady eye.
Step 2: Draw the wing on the side of the body. It should look almost like a turned-over triangle with rougher edges.
Step 3: Just beneath the beak, draw a widely curving line to illustrate the chest.
Step 4: At the bottom of the belly, draw two long, thin legs.
Step 5: Connect the rest of the body together with a line that will form the back end of the bird.
Step 6: Finish by adding details of spots and feathers all over the body of the bird.
Interesting Facts about the Sandpiper
Sandpipers are shore birds that belong to the sandpiper family. Inhabiting several parts of Europe and Asia, they can be commonly found in mangroves, rice fields, estuaries, and areas with water. Sandpipers spend most of their lives on the ground, bobbing their tail and neck while foraging. This behavior is called “teetering”. It is a diurnal bird – which means it is active during the day.
Did you know?
- Sandpipers can be in groups up to one hundred, but usually forage alone
- They cut their prey into small pieces before swallowing it
- When migrating during the winter months, they travel in smaller flocks at night
- Mating season is from April to July
- Sandpapers live up to 12 years in the wild
Lesson Plan Idea – Have children do their best impersonation of “teetering”. Have a crafting time in order for them to create their beaks and tail feathers. Have the class vote for their favorite “teetering”


