
In this quick tutorial you'll learn how to draw a Scoter in 6 easy steps - great for kids and novice artists.
The images above represent how your finished drawing is going to look and the steps involved.
Below are the individual steps - you can click on each one for a High Resolution printable PDF version.
At the bottom you can read some interesting facts about the Scoter.
Make sure you also check out any of the hundreds of drawing tutorials grouped by category.
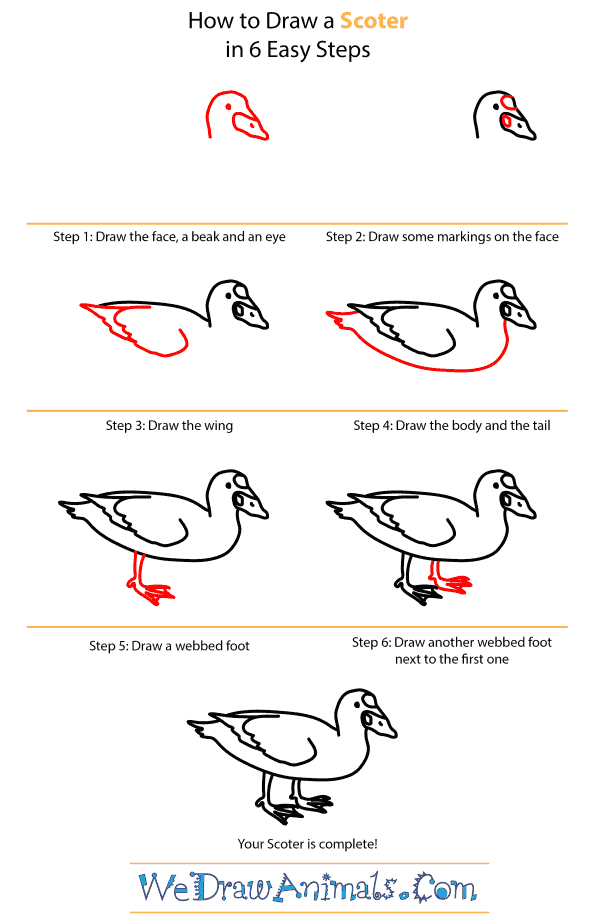
How to Draw a Scoter - Step-by-Step Tutorial

Step 1: Draw a rounded head that ends with a wide beak. Add eyes.

Step 2: Add some markings on the face to show detail.

Step 3: After drawing a long, slightly curved line for the back, add the wing.

Step 4: Draw the rest of the body and the tail by drawing one long, curved line that ends with feathered ends.

Step 5: Now draw the first webbed foot.

Step 6: Add the second webbed foot beside the first one.
Interesting Facts about the Scoter
Scoters are quiet birds, but during mating season the male will make whistling calls to entice a mate. Females give off a harsher call. Besides mussels, the Scoter will also eat shrimp, insects, small fish, and worms in order to sustain their diets. They are a highly sociable species, especially in the winter time. Mating season occurs in April and May, when the female will produce up to eight eggs, which will hatch in thirty days. They can be found across northern Russia and northern Europe.
Did you know?
- They are often seen in large flocks at sea
- The scientific name “Melanitta Nigra” refers to the black feathering of the males
- Scoters dive under water for mussels and swallows them whole
- They crush the shell of the mussel in their gizzards
Lesson Plan Idea – Gather videos up on the different noises that the Scoter makes. Compare them to the common duck most children know.
How to Draw a Scoter – Step-by-Step Tutorial