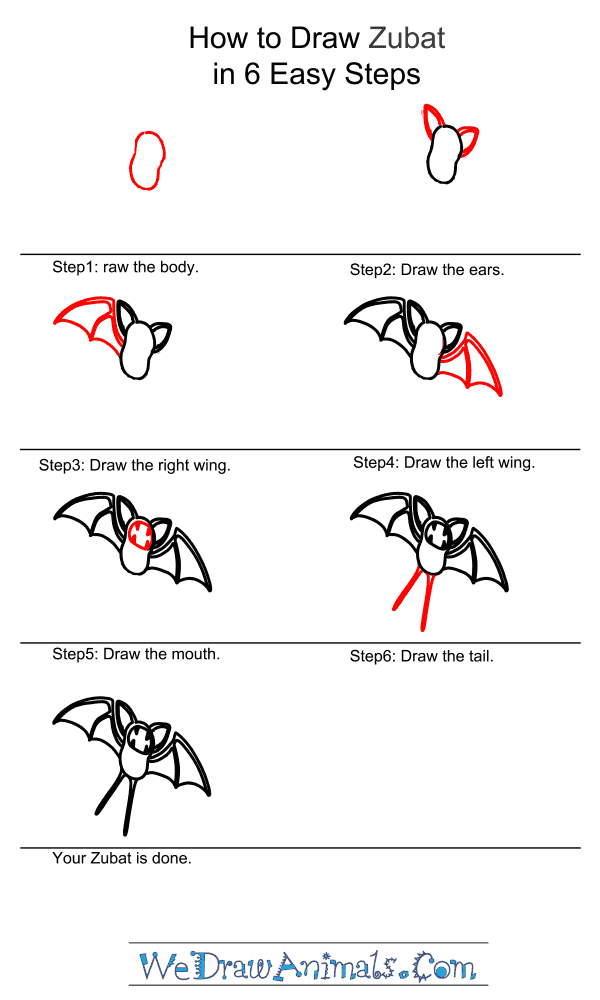
In this quick tutorial you'll learn how to draw Zubat in 6 easy steps - great for kids and novice artists.
The images above represent how your finished drawing is going to look and the steps involved.
Below are the individual steps - you can click on each one for a High Resolution printable PDF version.
At the bottom you can read some interesting facts about the Zubat.
Make sure you also check out any of the hundreds of drawing tutorials grouped by category.
How to Draw Zubat - Step-by-Step Tutorial
Step 1:
Step 2:
Step 3:
Step 4:
Step 5:
Step 6:
Interesting Facts about the Zubat
The Zubat is a bat-type Pokemon as its name suggests, with a blue body and purple wings. It does not have eyes, but uses echolocation to find its way around, just as actual bats do. Also like real bats, the Zubat enjoys dark caves, where it will sleep upside-down until nightfall. At this time, they will leave their caves with many others of their Pokemon species to find prey. Too much exposure to sunlight can make a Zubat feel sick, even burning its skin if exposed for much too long. But when these bats are trained by a Pokemon trainer, they’ve been known to be much better capable of handling sunlight, even direct sun beams.
Did you know?
- ?
- In addition to not having eyes, the Zubat has no nose.
- They are immune to ground-type Pokemon.
- The fangs of the male Zubat tend to be bigger than those of the females.
- The Zubat is found in many places in the Pokemon world, as they are very common. Aside from caves, they also hide in towers, under bridges and any other place where light can’t disturb their skin or their slumber.
- They emit a loud, high-pitched cry when in flight. This helps them to use their echolocation, which keeps them from blindly flying around.
Arts and Crafts Activity Notes: Draw the Zubat and distribute copies of it to each student or child who will be participating. Instead of having them color in the Zubat directly, prepare different colors of construction paper: black for its mouth, blue for the body and purple for its wings and ears. Have the children make paper airplanes out of any regular paper, though a sturdy light blue construction paper (the same color as we are using for the Zubat) might work better for this purpose. Once the airplanes are made, instruct each child to carefully cut out the design of the Zubat and then use glue sticks to fix it carefully onto the paper planes. Now you have your own room full of Zubats who can fly! Alternatively, you can use string to hang them upside-down from the ceiling to have your own colony!


