
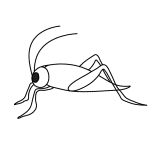
In this quick tutorial you'll learn how to draw a Baby Grasshopper in 3 easy steps - great for kids and novice artists.
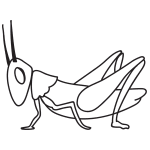
The images above represent how your finished drawing is going to look and the steps involved.
Below are the individual steps - you can click on each one for a High Resolution printable PDF version.
At the bottom you can read some interesting facts about the Baby Grasshopper.
Make sure you also check out any of the hundreds of drawing tutorials grouped by category.
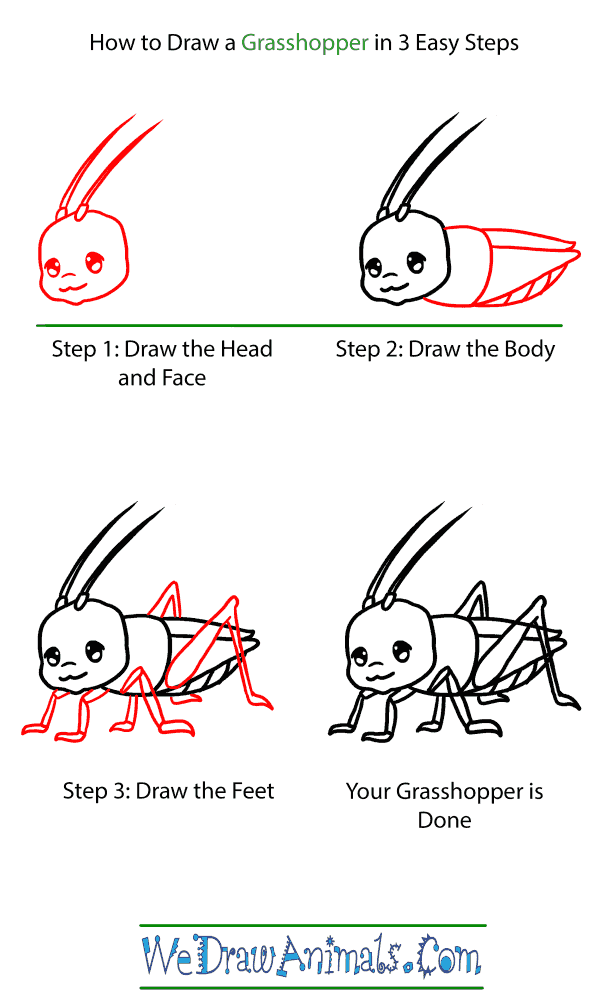
How to Draw a Baby Grasshopper - Step-by-Step Tutorial
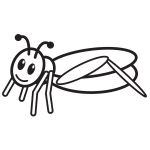
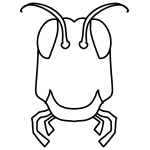

Step 1: We'll start with the head and face of the Grasshopper. Begin by tracing the shape of the head, try to make it like a square but with curved lines and rounded corners. Next we'll draw two eyes by drawing two circles each with a half circle drawn into the bottom and a smaller circle above that. shade the inside of the eyes but leave the smaller circles inside unshaded. add a small curved line between the eyes but closer to the left eye. this will give our grasshopper a nose. below that, draw the mouth by making two connected curved lines. now all thats left is the antennae, draw two small ovals at the top of the head and from each one draw two long gently curving lines that meet in a point. Now we're finished with our Grasshopper's head!

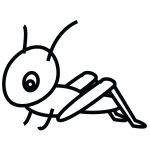
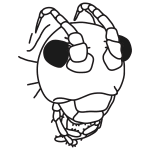
Step 2: Next we'll draw the body by making two curved lines back from the head and connecting them with a third line going up and down. When you've done this, draw a triangle with a flat top behind the first section of the body. Add a curved line above it that curves back to meet the far point of the triangle, and below the triangle draw another curved line that connects to the first section of the body. in the space created, draw three lines going up and down and our Grasshopper is beginning to take shape!

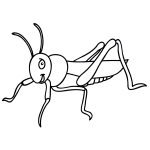
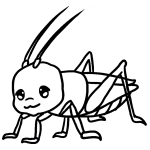
Step 3: Now comes the tricky part, drawing the Grasshopper's legs. For the front two legs, draw them in three sections in an 's' shape just below the head. For the middle pair of legs, draw two leg segments just like the bottom two of the front legs, but draw it connected to the middle of the front body section. for the other leg of this pair draw three segments: a short one attached to the first body section, and another two going down and facing the opposite direction as the first three legs we drew. the back legs are longer, and to start make two triangles one inside the other on the top of the body. then add a foot just below the body in line with the triangles you just drew. to make the last leg draw a half circle in the corner of triangle from step 2 and draw two lines up and to the right that almost meet. Curve the two lines down into a skinnier leg segment, and then add the final foot. Now your Grasshopper is done!
How to Draw a Baby Grasshopper – Step-by-Step Tutorial