
In this quick tutorial you'll learn how to draw a Cute Jay in 7 easy steps - great for kids and novice artists.
The images above represent how your finished drawing is going to look and the steps involved.
Below are the individual steps - you can click on each one for a High Resolution printable PDF version.
At the bottom you can read some interesting facts about the Cute Jay.
Make sure you also check out any of the hundreds of drawing tutorials grouped by category.
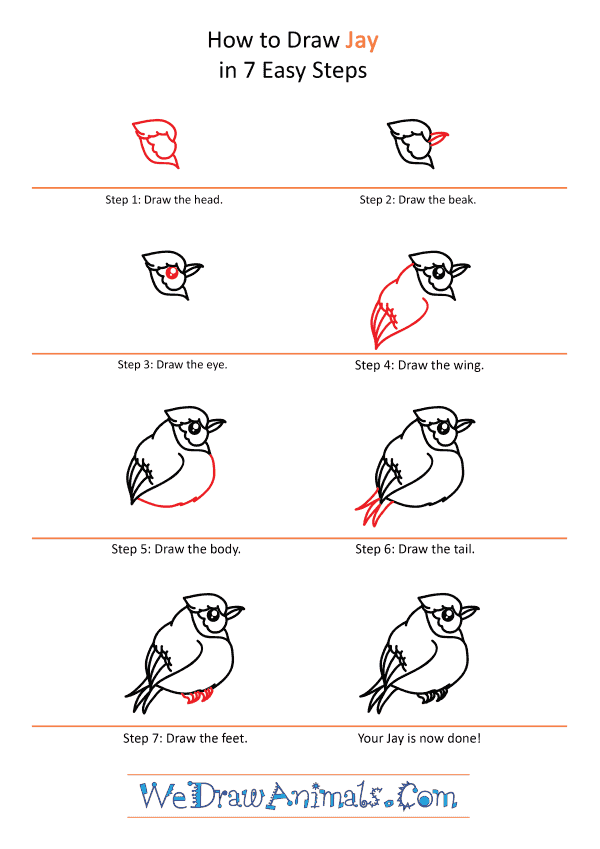
How to Draw a Cute Jay - Step-by-Step Tutorial


Step 1: First, you'll draw the roughly rectangular head with a lumpy wing-like shape along one side in the middle and two extended points opposite one another in the lower right and upper left.

Step 2: Next draw the thin beak with a slight curved point on the upper part beside the wing-like area of the head.

Step 3: Then you'll draw in the round eye in the upper part of the wing-like area of the head.

Step 4: After that, you'll draw the wing with four longer feathers near the tip and a wavy line above them for the smaller feathers on the upper wing.

Step 5: Then you'll draw a semi-circle between the wing and the lower part of the head for the belly.

Step 6: Next, draw three spiky tail feathers below the wing.

Step 7: Finally, you'll draw the small feet and curled toes under the belly.
How to Draw a Cute Jay – Step-by-Step Tutorial