

Step 1: Draw a small head with bulging eyes.

Step 2: Now add a big shell behind the head, using uneven lines to draw it.

Step 3: Draw two short legs in the front of the body.

Step 4: Now add two stubby hind legs at the back of the body.

Step 5: On the back of the body add a small, curved tail with a point.

Step 6: Add the pattern to the shell and your drawing is done.
Interesting Facts about the Map Turtle
The Map Turtle is an aquatic species of turtle. (Meaning that they live in the water) During the hibernation season they actually bury themselves in the sand under the water. This helps regulate their body temperature. (Basking in the sun then hibernating in the water) They only forage for food during the daytime, where they eat snails, clams, insects, mollusks, and crayfish.
Did you know?
- They were named for their shell that looks like a map
- They are able to take in oxygen through their skin
- Map Turtles lay in groups in the summer to absorb the Sun’s heat
- It disappears at the slightest disturbance
- Females are larger than the males
Lesson Plan Idea – Find several photos of a Map Turtle carapace (shell) – make sure that each photo is different. Just for fun, have children compare the shells to geography maps in their textbooks to see if any of the shells match (or close to it) our geography maps of today.
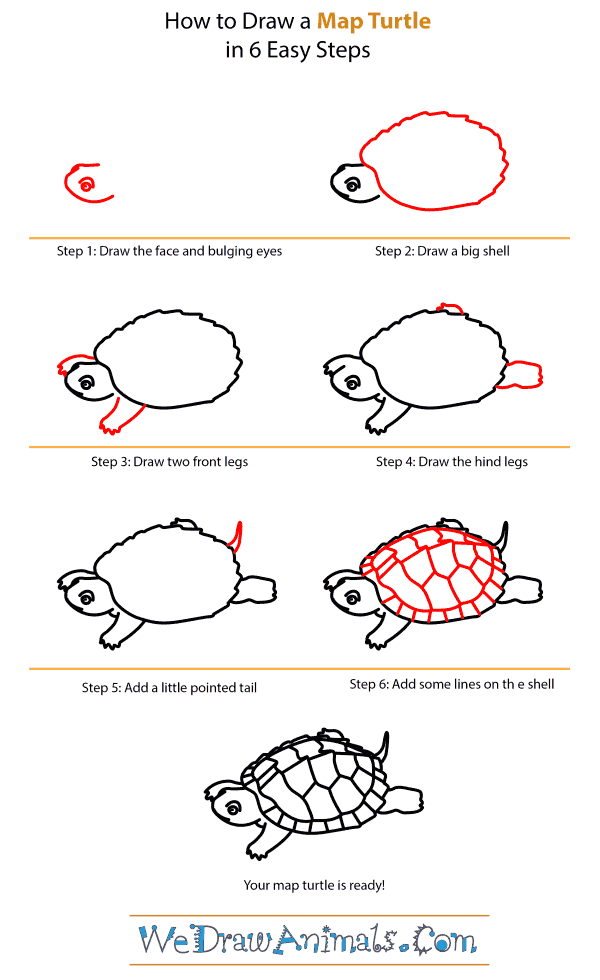
How to Draw a Map Turtle – Step-by-Step Tutorial