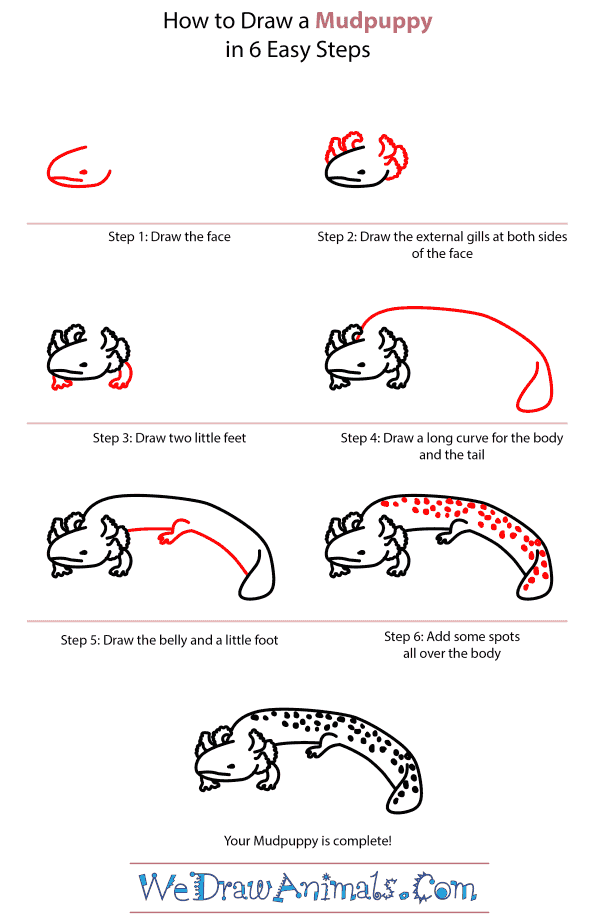
In this quick tutorial you'll learn how to draw a Mudpuppy in 6 easy steps - great for kids and novice artists.
The images above represent how your finished drawing is going to look and the steps involved.
Below are the individual steps - you can click on each one for a High Resolution printable PDF version.
At the bottom you can read some interesting facts about the Mudpuppy.
Make sure you also check out any of the hundreds of drawing tutorials grouped by category.
How to Draw a Mudpuppy - Step-by-Step Tutorial
Step 1: Draw a slightly oblong head, complete with mouth and eyes.
Step 2: Draw external gills that grow upward on both sides of the face.
Step 3: Add two tiny feet at the front of the body, toward the back of the head.
Step 4: Now we will draw a long curve for the rest of the body and the tail.
Step 5: Draw the belly, that will connect the rest of the mudpuppy. Add a little foot.
Step 6: Finish your drawing by adding a speckled pattern to the body.
Interesting Facts about the Mudpuppy
Mudpuppies are aquatic salamanders and can be found in the Midwestern United States and Central Canada. Often, the entirety of their lives are spent muddy waters, lakes, or steams. Due to this habitat choice, the species is in danger from water pollution and habitat destruction due to trash. However, they have not been listed yet as an endangered species. Adult can reach almost thirteen inches long.
Did you know?
- Also called a “Water Dog”
- Its entire body has a protective covering of slime
- They do not have a constant temperature, it changes with the environment
- They do not have poisonous skin like other salamanders
- They are carnivores (meat eaters) and feed on water invertebrates
Lesson Plan Idea – Using sand and an empty plastic container, have students create a Mudpuppy habitat complete with water. Using different methods – see how just the slightest change (direct sunlight for example) changes the temperature of the water.


