
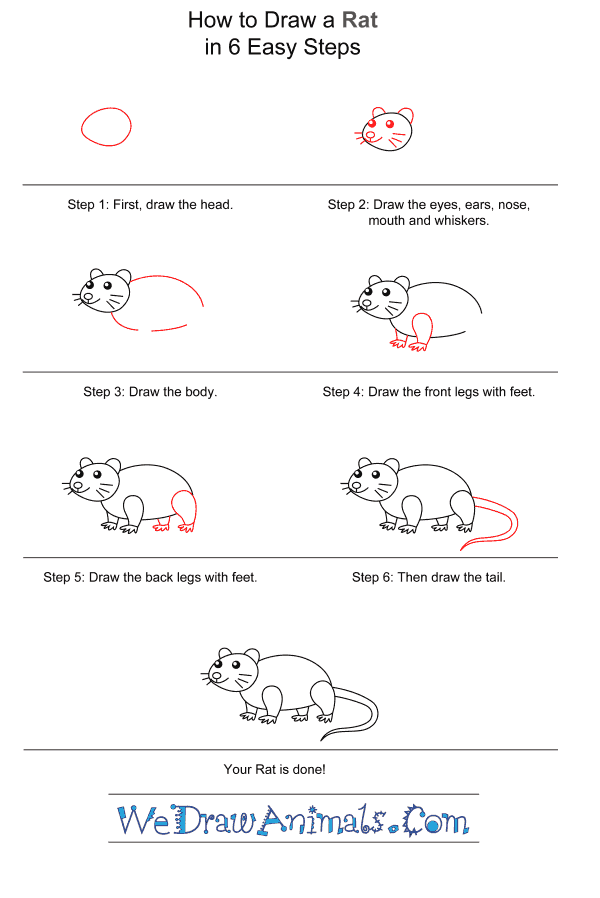
In this quick tutorial you'll learn how to draw a Rat For Kids in 6 easy steps - great for kids and novice artists.
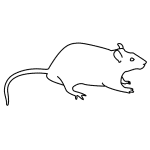
The images above represent how your finished drawing is going to look and the steps involved.
Below are the individual steps - you can click on each one for a High Resolution printable PDF version.
At the bottom you can read some interesting facts about the Rat For Kids.
Make sure you also check out any of the hundreds of drawing tutorials grouped by category.
How to Draw a Rat For Kids - Step-by-Step Tutorial

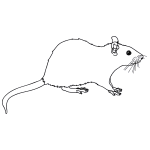

Step 1: Start your rat by drawing its head. Make the left side a little more narrow for its snout.

Step 2: Add in little ears on top of the head and then draw some details for the face. Put the nose on the front of the snout. It's important for rats to have a good sense of smell to find food. Add eyes, whiskers, and a mouth.

Step 3: Now draw curves for the rat's back and stomach. Don't forget to leave gaps for the legs.

Step 4: Draw two front legs in the first space and then add feet with toes.

Step 5: Do the same for the back legs and feet. Rats need to be able to scurry away fast and fit in small places so their back legs are pretty short too.

Step 6: Finish your rat with a long, curved tail.

Step 7: Now that you've finished your rat, color the tail and feet pink where rats don't grow fur.
How to Draw a Rat for Kids – Step-by-Step Tutorial